

Are you looking for a payments plugin for WordPress? If you are using WordPress, you know that you need a way to integrate the WordPress platform with a payment gateway. We want to show you the easier way to do it.
A payments plugin for WordPress is a plugin that connects WordPress with a payment gateway. WordPress alone doesn’t have a way to collect payments therefore the best and easier way to remedy the situation is to get a plugin.
Let’s see how.

Contents
WHAT IS A PAYMENTS PLUGIN FOR WORDPRESS?
If you want to sell your products or services right from your website, a reliable payment plugin is indispensable.
PLUGIN: A software plug-in is an add-on for a program that adds functionality to it.
WordPress payment plugins come with several different features and capabilities. You need to choose the one that best suits your business needs and seamlessly integrates with your site.
A good payment plugin fits your business needs, seamlessly integrates with your website, and reduces cart abandonment rate and payment failures.
The most important thing a payment plugin needs to achieve is preventing customers from leaving your site before realizing the payment and making it easy for them to do so without adding complication and time loss.
Customers may leave for several reasons, such as a complicated user interface or a missing payment option.
A good payment plugin reduces cart abandonment rate and payment failures as much as possible.
PAYMENTS GATEWAYS VS. WORDPRESS PAYMENTS PLUGINS
To process payments on your WordPress site, you’ll need to use a payment gateway provided by a third party, such as PayPal, Stripe or Authorize.net to name a few.
Payment gateways process and authorize payments made with credit or debit cards through different online paying platforms. WordPress payment plugins integrate payment gateways with your site.
PAYMENTS PLUGIN AND RECURRING PAYMENT PLUGIN
WPForms is the best WordPress contact form plugin. It is a drag and drop form creator. It comes with many features and Addons needed to run a successful WordPress site.
WPForms allows for many features, accepts payments with major Payments Gateways, and has an incredible recurring payment feature.
WHY RECURRING PAYMENT ?
One of the more consistently profitable ways to secure passive income comes from a membership site or recurring payments on products.
Companies that collect automated payments (think Dollar Shave Club, Netflix or your cable company, and so on) don’t have to think as much about sales and marketing. They’re more focused on making current customers happy.
Not only that, but recurring memberships like these tend to grab some of those customers who never use the service or product, yet they keep paying. I figure almost everyone has a story about a gym membership they never used.
Let’s go over WPForms Recurring Payment WordPress plugin.
Whether you have an online donation form, a user registration form to access locked content, or a simple order form that sells physical or even digital products, WPForms has you covered if you want to accept recurring payments.
So, let’s take a look at how to enable recurring payment functionality on your WordPress forms using WPForms and Stripe.
HOW TO SET UP WPFORMS PAYMENTS AND RECURRING PAYMENTS
Once you have gotten WPForms plugin installed, go on add New form.
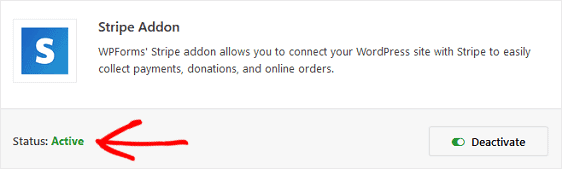
( Remember you have to activate the Stripe payment Addon so that you can connect WPForms with Stripe: WPForms allows you to accept recurring payments on your forms using Stripe.
That’s why the next step is to install and activate the Stripe addon. To do this, go to WPForms » Addon and find the one labeled Stripe addon )
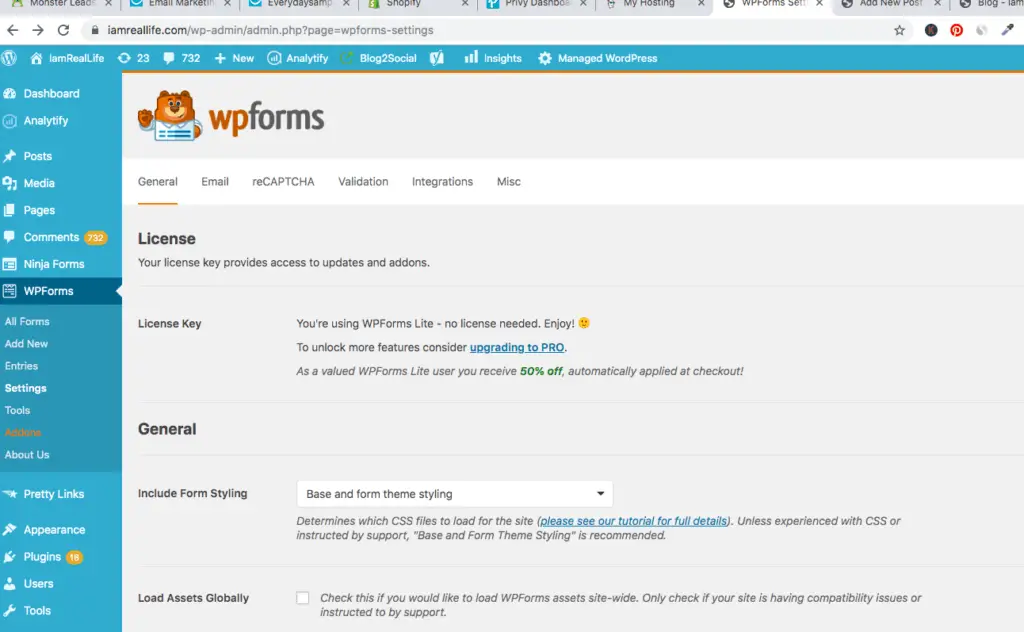
You can start getting WPForms from your WordPress site, go to Plugin, Add New, and type WPForms in the search field.
It will come up at the top of the page. You can install the Lite version of WPForms for free.
In this way, you can familiarize yourself with it and then upgrade. Payments and Recurring payments options are coming with the PRO version, which is also the best deal from WPForms.
- Go to WPForms » Add New to create a new form.
Let’s create an online donation form ( as an example ) that gives people the option to make a one-time donation or donate repeatedly.
For help with this step, check out our tutorial on creating a nonprofit donation form in WordPress. This is what our donation form looks like before customizing any of the form fields.
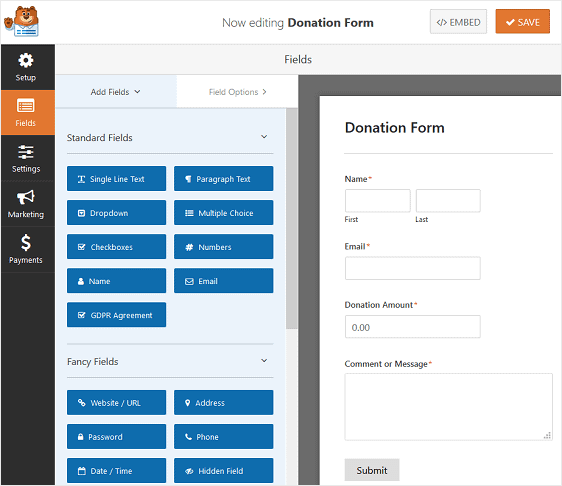
2. Customize Your WordPress Form Fields
You can add additional fields to your form by dragging them from the left-hand panel to the right-hand panel.
Then, click on the field to make any changes. You can also click on a form field and drag it to rearrange the order on your donation form.
To accept recurring payments using Stripe, you’ll have to add at the very least these two form fields for your form to work right:
- An items field such as Single Item, Multiple Items, or Dropdown Items
- A Credit Card field
You can also add a Total form field, so customers know exactly how much they’re being charged when submitting your form.
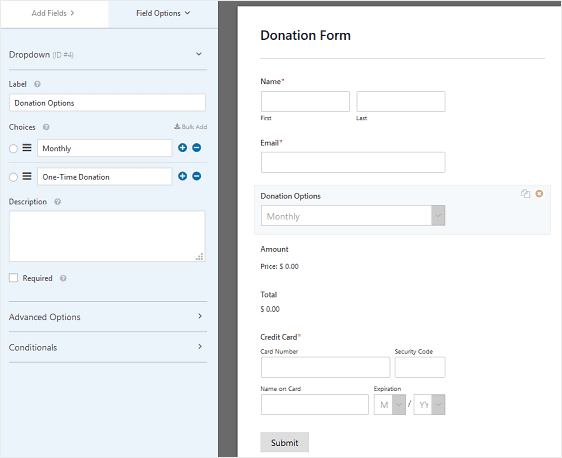
As you can see, we added a dropdown menu to choose whether they want to donate repeatedly or make a one-time payment and a field for selecting how much people want to donate, a Total and the Credit Card field.
When your form looks the way you want it to, click Save.
Configure Your Payment Settings
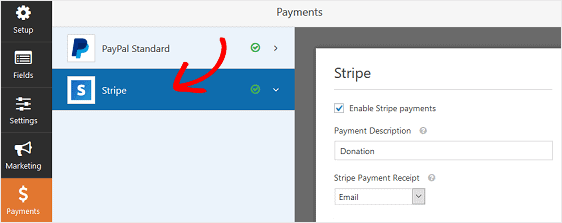
When your form is ready, go to Payments » Stripe to configure the payment settings so your form can accept payments from people using the Stripe payment gateway.
Next, click the checkbox labeled Enable Stripe payments, give your payment a description, and select Email as the Stripe Payment Receipt.
If you were only accepting a one-time donation from people, you would be all set. The next step would be to add your donation form to your website. However, you want to set up recurring donations, so you have to continue customizing.
To do this, scroll down a bit more on the Stripe settings panel and click the checkbox labeled Enable recurring subscription payments under the Subscriptions section.
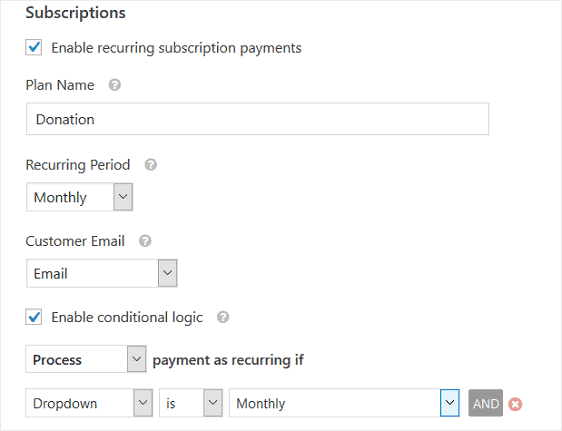
You will also have to configure the following:
- Plan Name: this is the title of the subscription and will appear on the Stripe transaction.
- Recurring Period: choose how often people will make regular payments—for instance, weekly, monthly, yearly, etc.
- Customer Email: by selecting Email from the dropdown menu, WPForms will send a notification to the customer once they submit their form. Contacting people via email, they input on the form is required for Stripe recurring functionality to work.
Lastly, you’ll need to set the conditional logic rules since you give people the option to make recurring donations or a one-time donation.
To do this, first select the checkbox Enable conditional logic.
Then, to make things super simple, configure the rule to say: Process payment as recurring if Dropdown is Monthly.
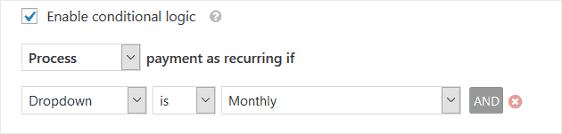
This way, any time someone wants to make recurring donations to your organization, their payment will process automatically according to the time interval you offered on your form.
Click Save.
Before adding your donation form to your website, test it to make sure everything is processed correctly.
Documentations are walking you through how to test Stripe payments before accepting actual payments for help with this.
PRICING
This features are available with the PRO version of WPforms.

The Pro version includes all the features needed to run a successful WordPress site, with tons of Addons to converts and increase leads.
Again you can test WPForms with the Lite Version. Then you can upgrade to PRO or any other plan.