

How to create countdown timers in WordPress? Are you wandering how it is possible to add a countdown timer to your WordPress site or to your pop-ups?
A countdown timer is a clock or simply a timer that tells visitors how much time is left for a particular offer or opportunity to expire. It can be used for flash sales, seasonal sales like Black Friday, Holiday Seasons, etc. A countdown timer can add urgency to the offer and compel visitors to take action.
Let’s see how to set up a countdown timer.
HOW TO CREATE COUNTDOWN TIMERS IN WORDPRESS
You can use countdown timers in many circumstances to promote different deals and opportunities. WordPress doesn’t have a built in system that allows you to create such a timer. The best way to create a timer in no time and with ease is to use a plugin.
The plugin we will use is OptinMonster; you can create with ease stunning countdown timers for your visitors with this plugin.
To be able to create countdown timers, you have to get at least the OptinMonster Pro Plan. If you do not have OptinMonster yet, you have to sign up for an account.
Here all the steps to create a countdown timer.;
1.SIGN UP FOR OPTINMONSTER
Once you have gone to this page and signed up, follow the instructions to connect your WordPress site to OptinMonster. They are easy to follow, just a few clicks.
2.CREATE A FLOATING BAR OPTIN
Now you are all set. To create a campaign, enter the OptinMonster dashboard and click on “Create New Campaign.”

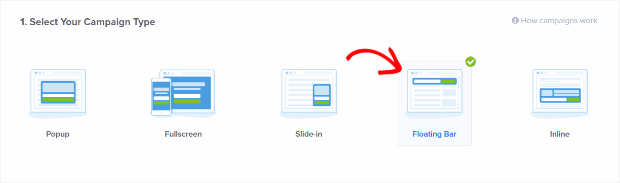
When the next window comes up, select “floating bar”:
Once you have selected the floating bar pop-up, you will be directed to a window that shows you several templates to choose from. Once you have decided the best template for you, select the one you want.

Remember that you can add a timer to any existing pop-up you already have with a few clicks if you do not want to create one from scratch. ;
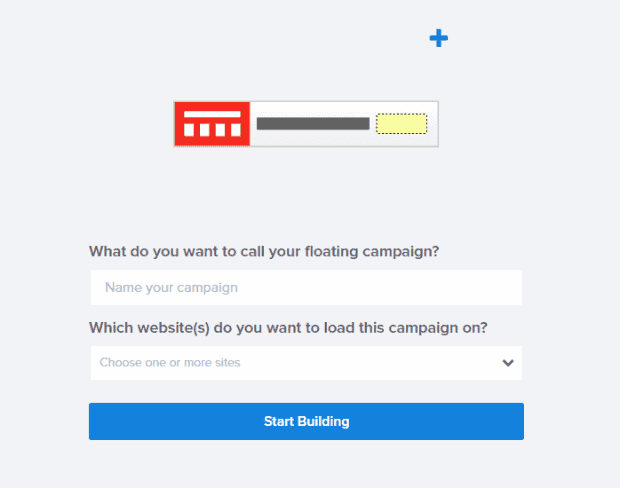
Once the selection is made you are asked to choose a name for your pop-up:
3. DECIDE THE DISPLAY SETTINGS
Those settings let you decide the bar position; you can place the bar at the bottom or the page’s top. The bar is set by default to be placed at the bottom; if you want to place it at the top, go to Display Settings and toggle Load Floating Bar at the top of Page to the On position.
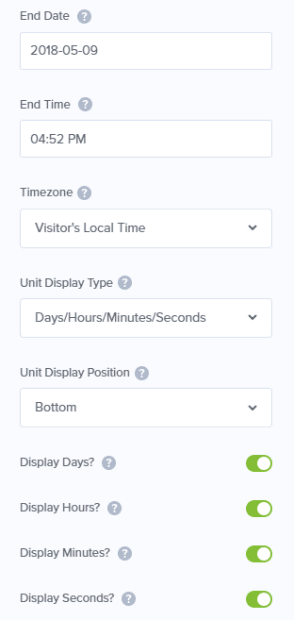
4.DECIDE THE END DATE
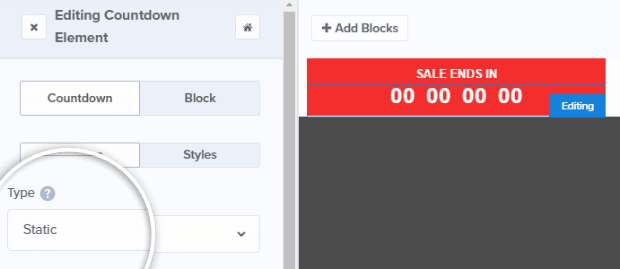
Once that is done, you have to decide for the end date or time of your countdown. The Type should be set to Static so every visitor will see the exact same countdown when they arrive at your site.
And now the date and time settings:
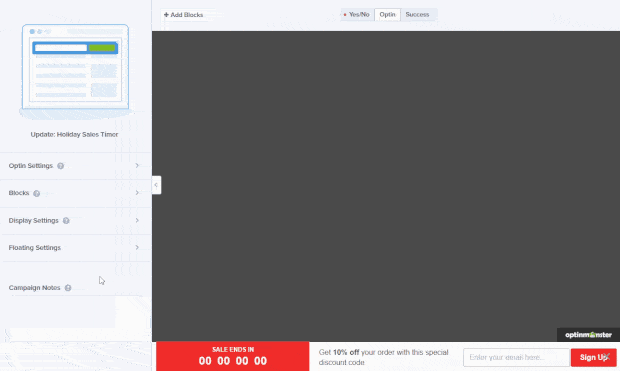
5.CUSTOMIZATION
You can customize the pop-up as you wish; OptinMonster offers various possibilities; you can change color, text, font, and more. OptinMonster is one of the most customizable plugins for pop-ups and timers.
Here an example of text customization:
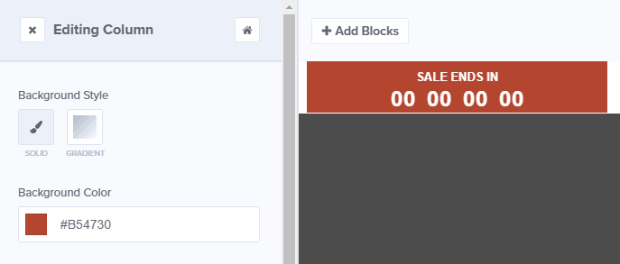
You can change the column background according to your theme and offer type:
You can change the offer text as well:
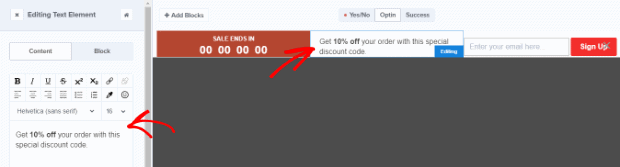
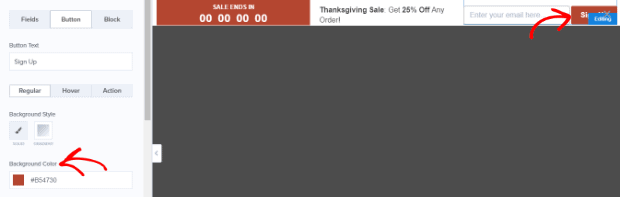
You can customize the sign-up button to make it more visible and attractive, click directly on the button in the live preview to bring up the editing tools, and then click on the Button tab to edit the button styling.
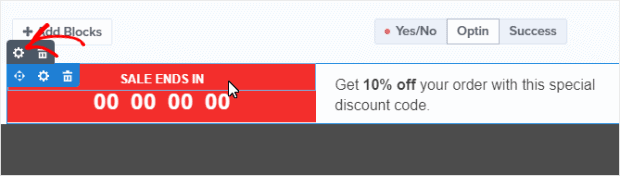
Now the first part of the bar is done. You want to personalize the success page or message, meaning once the visitor has signed up, they should get a message whether or not the operation was completed. If you promised a discount code, you should provide the code, or if you promised something else, a message, or the page where to get it.
To do that, click on the Success tab.

6. CONNECTION WITH E-MAIL SERVICE
If you an e-mail service, you can connect the account to OptinMonster to automate the collection of e-mails and, eventually, the autoresponder. OptinMonster integrates with most e-mail providers.
7. DISPLAY RULES
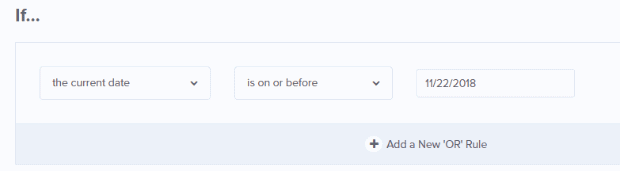
You can decide when to show the bar based on numerous options; OptinMonster lets you choose to show the bar on a specific URL when the visitor first arrives or after a while someone has been on the page. There are tons of choices. You can choose to display the bar before a certain date as well:
Go to the Display Rules tab and set your floating bar to be displayed on or before a certain date.
8.PUBLIS THE POP-UP
Go to the Publish tab and toggle the Status to Live. Then, Save the campaign.

Since your site is already connected with OptinMonster, the pop-up should go live.
Let me know if you have any questions in the comments below.
RELATED QUESTIONS
Here some related questions to “How to create countdown timers in WordPress?” and related answers:
- How do I create a countdown widget?
If you want to create a widget as a countdown, you have to select the “inline campaign” instead of the floating bar. Follow the instructions, and you will be able to get it done from there.
- Is there a free version of OptinMonster?
OptinMonster has a 30 days money back policy, but no free trials or free version.
- Do I need OptinMonster?
If you need to collect e-mails and want to find ways to increase conversions, sooner or later, you need a tool like OptinMonster. If you have a brand new site, maybe wait to get some traffic and get this tool. You can use it to create custom campaigns for specific pages or site-wide campaigns. One of the best features is the Exit-Intent technology.
CONCLUSION
If you have any question or you want to add anything, leave it in the comments below.