
• How to Install a WordPress Plugin – Step by Step for Beginners
WordPress Plugin: after installing WordPress, the first thing every beginner needs to learn is how to install a WordPress plugin. Plugins allow you to add new features to WordPress, such as add a gallery, slideshow, etc.
There are thousands of free and paid plugins available for WordPress. But before you start, if you are using WordPress.com, then you cannot install plugins. WordPress.com has its limitations. You cannot install plugins on WordPress.com unless you upgrade to their business plan. On the other hand, you can install any plugin you want on your self-hosted WordPress.org website right out of the box.
Installing a WordPress plugin involves three methods:
- Installing a WordPress plugin using search
- Uploading a WordPress plugin
- Manually installing a WordPress plugin using FTP
Install a Plugin using WordPress Plugin Search
The easiest way of installing a WordPress plugin is to use the plugin search. The only downside of this option is that a plugin must be in the WordPress plugin directory, which is limited to only free plugins.
First thing you need to do is go to your WordPress admin area and click on Plugins » Add New.
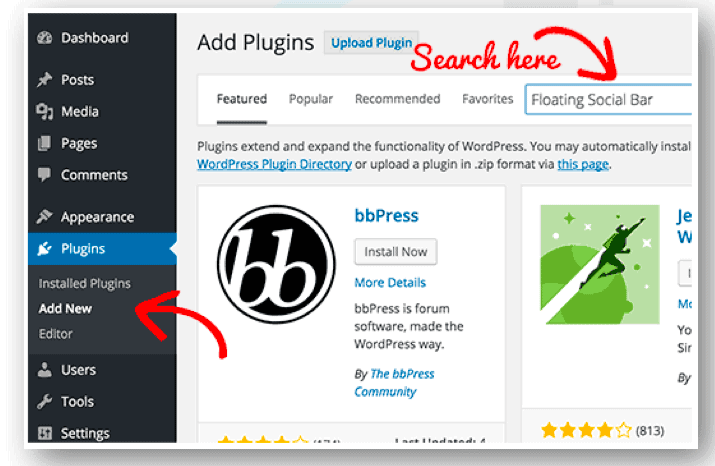
You will see a screen like the one in the screenshot above. Find the plugin by typing the plugin name or the functionality you are looking for like we did. After that, you will see a bunch of listings like the example below:
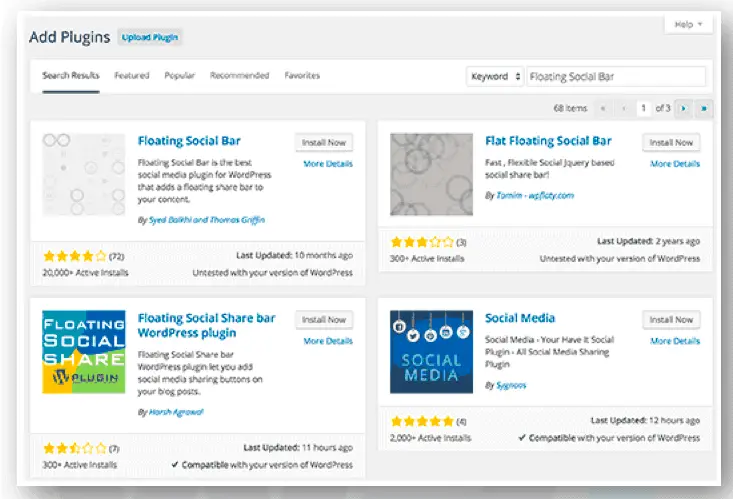
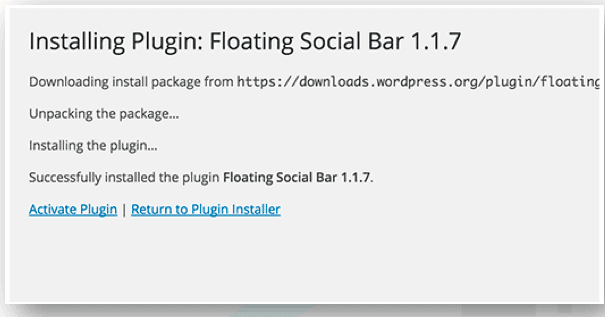
You can pick the plugin that is best for you. Since in our search, we were looking for the Floating Social Bar, which happens to be the first plugin, we will click the ‘Install Now’ button. WordPress will now download and install the plugin for you. After this, you will see the success message with a link to activate the plugin or return to the plugin installer.
A WordPress plugin can be installed on your site, but it will not work unless you activate it. So go ahead and click on the activate plugin link to activate the plugin on your WordPress site. That’s all; you have successfully installed your first WordPress plugin.
The next step is to configure the plugin settings. These settings will vary for each plugin. Therefore, it cannot be discussed in general.
Install a Plugin using the WordPress Admin Plugin Upload
Paid WordPress plugins are not listed in the WordPress plugin directory. These plugins cannot be installed using the first method.
That’s why WordPress has the Upload method to install such plugins. We will explore how to install WordPress plugins using the upload option in the admin area.
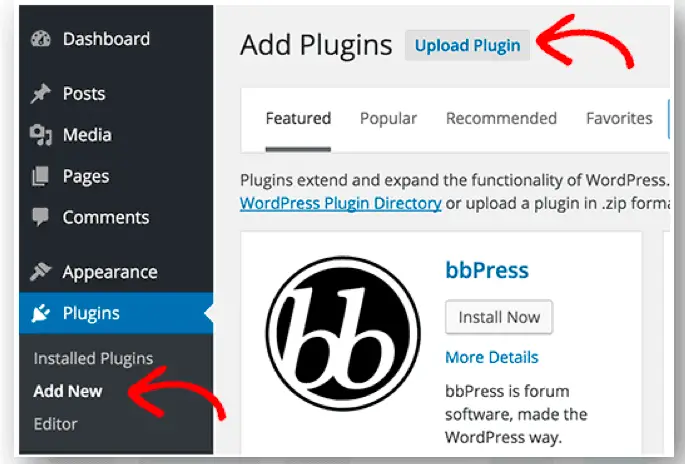
First, you need to download the plugin from the source (which will be a zip file). Next, you need to go to the WordPress admin area and visit Plugins » Add New page.
After that, click on the Upload Plugin button on top of the page.
This will bring you to the plugin upload page. Here you need to click on the choose file button and select the plugin file you downloaded earlier to your computer.
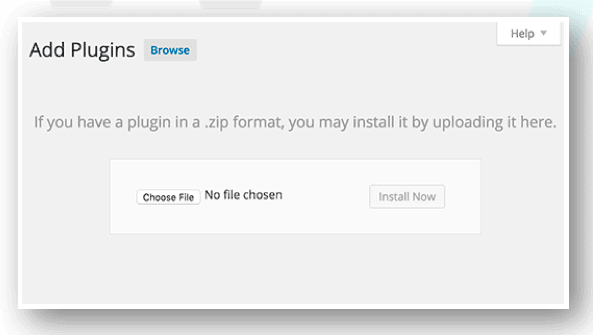
After you have selected the file, you need to click on the install now button.
WordPress will now upload the plugin file from your computer and install it for you. You will see a success message like this after the installation is finished.
Once installed, you need to click on the Activate Plugin link to start using the plugin.
You would have to configure the settings to fit your needs. These settings will vary for each plugin. Therefore, it cannot be discussed in general terms.
Manually Install a WordPress Plugin using FTP
In some cases, your WordPress hosting provider may have file restrictions that could limit your ability to install a plugin from the admin area.
In this situation, your best bet is to install the plugin manually using FTP. The FTP manager method is the least friendly for beginners.
First, you will need to download the plugin’s source file (it will be a zip file). Next, you need to extract the zip file on your computer.
Extracting the plugin zip file will create a new folder with the same name. This is the folder that you need to upload to your website using an FTP client manually.
You would need to access your host through the FTP manager. If you do not have your FTP username and password, then contact your WordPress hosting provider and ask them.
Open the FTP client on your computer and connect to your website using the login credentials provided by your web host. Once connected, you need to access the path /wp-content/plugins/
Next, upload the folder you extracted from the zip file to the /wp-content/plugins/ folder on your web server.
After uploading the files, you need to visit the WordPress admin area and click on the Plugins link in the admin menu. You will see your plugin successfully installed on the plugins page.
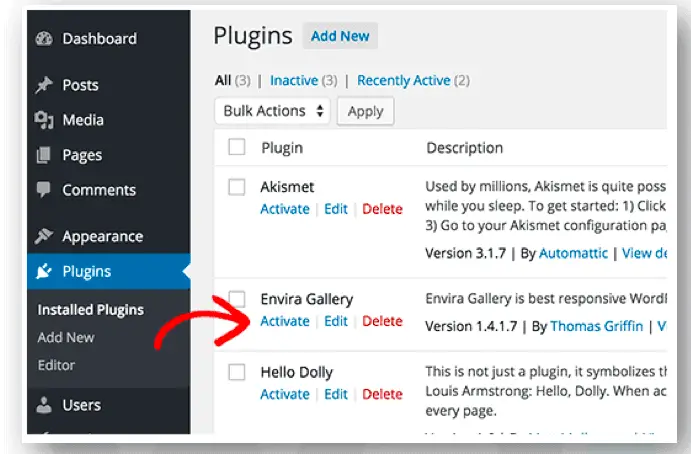
You need to click on the Activate link below the plugin. Upon activating, you may need to configure the plugin settings. WordPress plugins come with their settings, which differ from one plugin to another.
Having the right set of WordPress plugins and tools can help you grow your online business. There are all-star plugins that can help with content strategy, SEO, site security, and even Facebook Messenger marketing.
There are over 54,000+ WordPress plugins that you can choose from. This makes it extremely overwhelming for new users to find the right plugin for their website.
Find Some you can use in my Resources.

“Let’s Interact: Write me a question if you have one, or ask anything”