

How to accept PayPal payments on WordPress? It is a good question since PayPal is not supported directly into WordPress. You have to integrate it with a plugin or more complicated operations. I want to show you an easy and quick way to do it.
Accept Paypal payments can be a bit complicated with WordPress since it is not already a WordPress feature. Normally, a person has to create Paypal buttons inside their PayPal account, copy the code into the WordPress site, or other complications. The best is to use a plugin that allows creating a form to integrate WordPress with PayPal with a few clicks and collect the customer information.
Let’s see how to do it.

EASY WAY TO INTEGRATE PAYPAL PAYMENTS ON WORDPRESS
Accept payments on WordPress can be a complex operation. For beginners, it can result in many hours spent to figure this out and a headache.
There are many situations in which a website owner is in need to collect a payment:
- E-book sale
- Digital products
- Subscriptions
- Service sale
- Collect donations
- Physical Product sale
How to make the process fast for a customer and easy to set-up for a WordPress site owner?
The best is to use a plugin that lets you connect to PayPal with a few clicks. Plugins are usually already set up with codes and all the necessary to make sure you have only to add a few pieces of information to be ready to go.
If you are using a form on your site, the chances are that you are already using WPForms. If you are not using WPForms yet, you can download it and install it easily from WordPress. WPForms let you collect your customer information and payments at the same time.

Here are the steps to take:
DOWNLOAD WPFORMS
You can download WPForms from your WordPress site, or you can go to the WPForms official site and get the plugin from there.
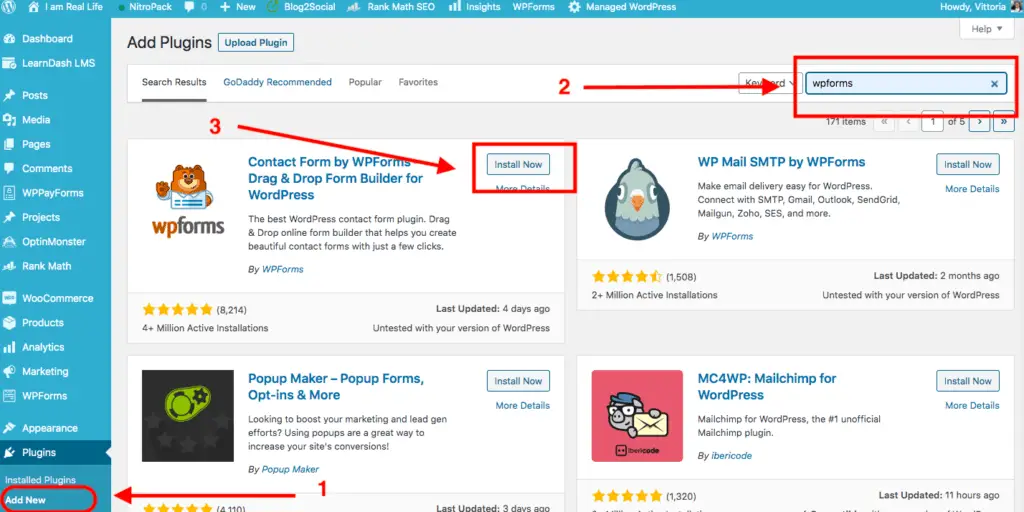
If you choose to download it from your WordPress dashboard, you have to go to Plugins and then click on Add New, then type WPForms on the search bar. WPForms will come up immediately. You have to install and activate the plugin:
Once you have WPForms, you have to install the PayPal Standard Add-on. To do this, you have to go to the WPForms menu on your WordPress site, click on Add-ons. Once you get the list of add-ons, search for the PayPal Standard Add-on and click on Upgrade.
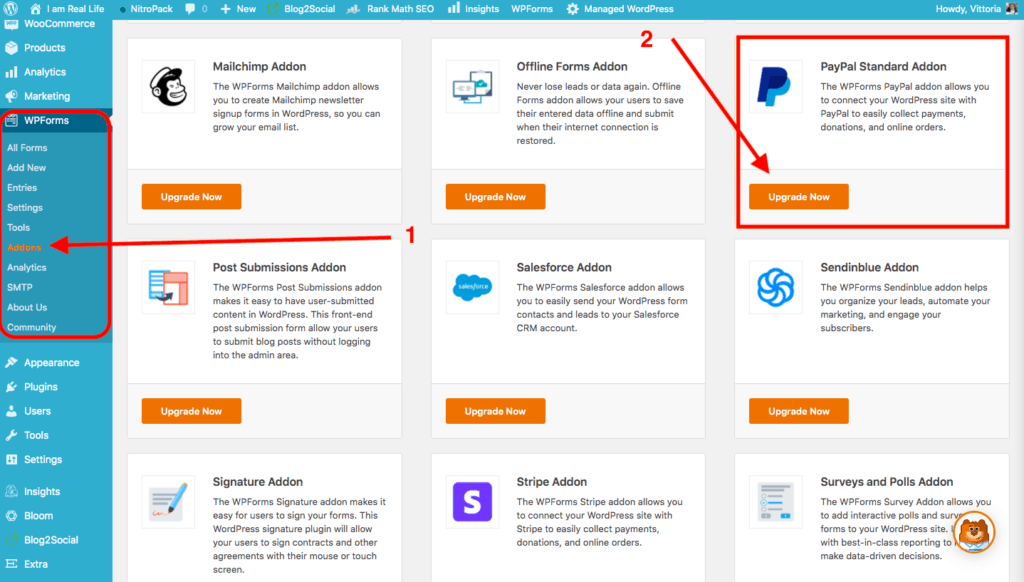
You have to have the Pro Plan in order to use the PayPal Standard Add-on.
CREATE YOUR FIRST FORM
Now that you have the PayPal Standard Add-on and activated it, you have to set it up to start using it.
You do this by creating the form you need to collect payments. In other words, creating your first form.
You can create a new form using the Billing / Order Form template, or you can choose another template and add the payment field, or create a form from scratch.
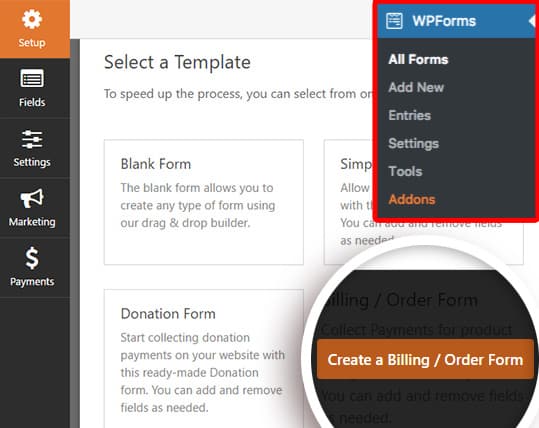
The template already includes the most important and most used fields in a payment form. Again you can change it as you like it. Remember, you need at least one item field to have the form functioning. (which could be a Single Item, Multiple Items, Checkbox Items, or Dropdown Items field).
CONNECT THE FORM TO PAYPAL
Go to Payments » PayPal Standard. Here, you’ll need to check the box labeled Enable PayPal Standard payments.
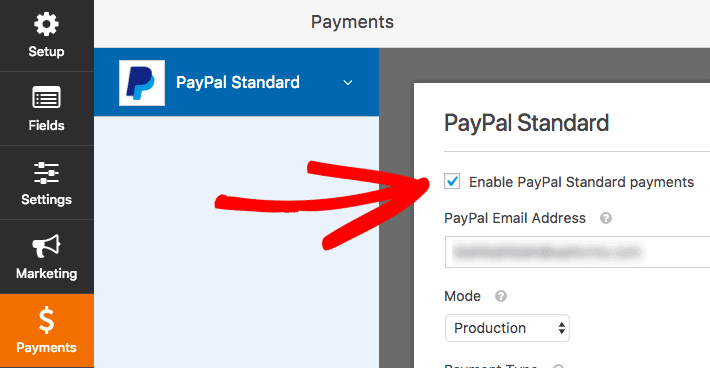
Here are the additional PayPal settings to fill out so that you can connect and have the form properly functioning in every instance:
- PayPal Email Address: The email for your PayPal account
- Mode: Options are Production or Test / Sandbox
- Payment Type: Options are Products and Services or Donation
- Cancel URL: If users don’t complete payment on PayPal, this is the URL they’ll be redirected to
- Shipping: If you’re shipping a product to the user, you can choose to ask for and require an address field during PayPal’s checkout process
You are set to go.
ADVANCED OPTIONS
There are more advanced options; for example, you can set up condition logic if you need it. This is a more advanced option for more complex operations. Conditional logic allows you to create “smart forms.” Meaning those forms automatically change the content or behavior based on a user’s selections.
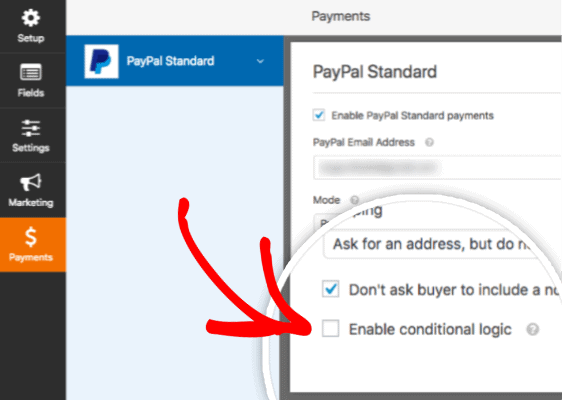
To do this open the form builder and go to Payments » PayPal Standard. Under the options you set up earlier, check the box labeled Enable conditional logic.
Now you can select the options and the rules for your conditional logic form:
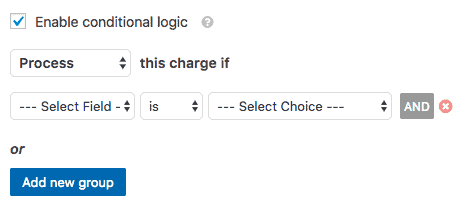
You can use options in choosing the logic you want to apply; for example: is not, empty, not empty, contains, does not contain, starts with, ends with, greater than, and less than.
If you need to add conditional logic, make sure you add the fields you need on your form first:
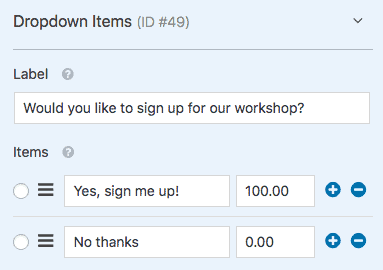
After setting up this field and going to Payments » PayPal Standard, we’ll check the box to Enable conditional logic. It would look like this:

This is just an example. Depending on your needs, you may set up different logic and paths for your customers.
CONCLUSION
I hope this was useful to you. If you have any questions or want to add anything, leave it in the comments below.