

Donation Form: were you looking for a simple way to collect donations, do fundraising, and, at the same time, be able to customize the experience easily?
If you have a WordPress site and you need to create donation forms without complications, we are going to show you what is the best way.
Contents
DONATION FORMS
Donation forms may be needed for different purposes, here some of the usages:
- Donation form for Non-Profit for WordPress
- Donation form for Churches donations
- Donation form for Charities
- Donation form for Fundraising
And more. If you use a form, you can keep the reader on your site and get more engagement. Styles can also be customized. Therefore you can ask questions or get feedback.
Payments collections are done on the same page. Therefore the user doesn’t have to navigate to other sites, log-in, and do other complicated actions that may dissuade someone from the actual donation.
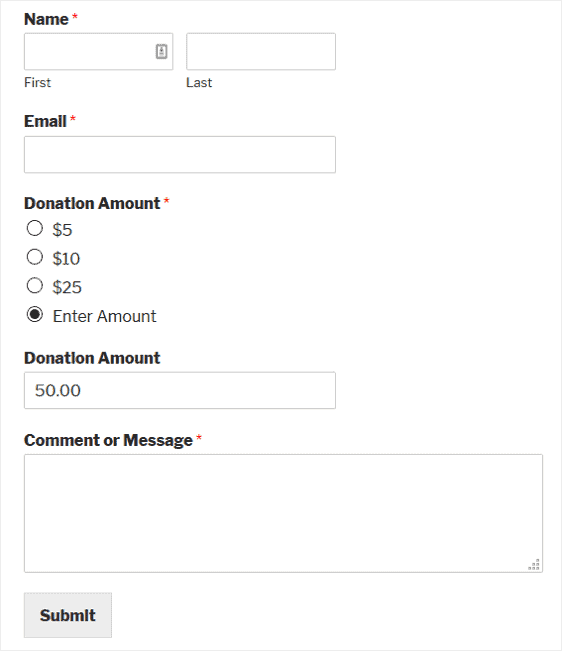
Example of donation form:
DONATION FORM PLUGIN FOR WORDPRESS
The easiest way to create a donation form in WordPress is to get a plugin that can create this for you, together with all the needed integrations.
Let’s introduce WPForms.
WPForms is the best WordPress contact form plugin with 3+ million users. WPForms is not only a contact form plugin, but it also has many features available so that with this one plugin, you can perform many functions.
To list a few things you can do or add to your forms with WPForms, beside collect donations:
- File Uploads
- Multi-Page Forms
- File Uploads
- User Registration
- PayPal Addon
- Stripe Addon
- Post Submissions Addon
- Surveys and Polls Addon
- Signature Addon
- Form Pages Addon
- Form Abandonment Addon
- Offline Forms Addon
- Form Locker Addon
HOW TO CREATE A DONATION FORM
The first step is to install WPForm.
You can install it for free and then upgrade or get the Premium version directly.
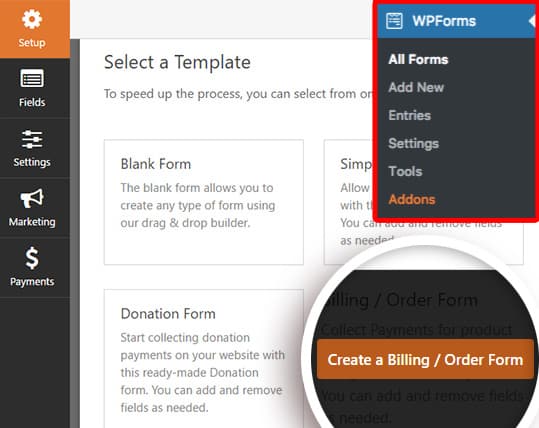
Next, go to WPForms » Add New to create a new form.
Select then the “donation form template”.
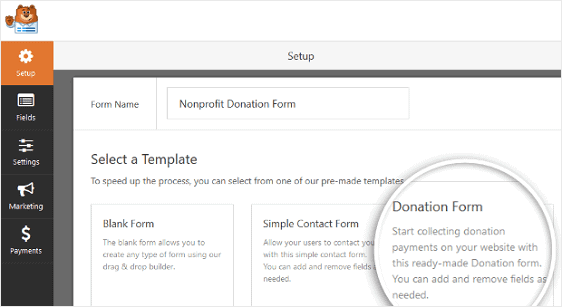
WPForms will create a donation form.
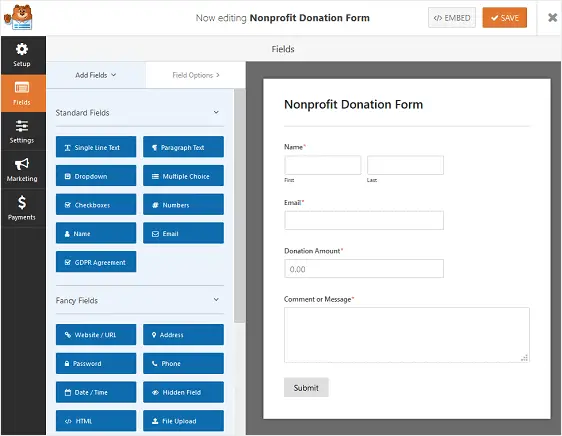
You can add additional fields to your donation form by dragging them from the left-hand panel to the right-hand panel. You can do this with your mouse.
Then, click on the field to make any changes. You can also click on a form field and drag it to rearrange the order on your contact form.
You can create Multiple choice payments field and use any item on the left panel to customize your form.
To add the multiple-choice payment field, click the Multiple Items button under Payment Fields. You can drag and reorder the fields so that the Multiple Items field is directly above the Donation Amount field.
Once you have made the necessary customization you can also set up notifications.
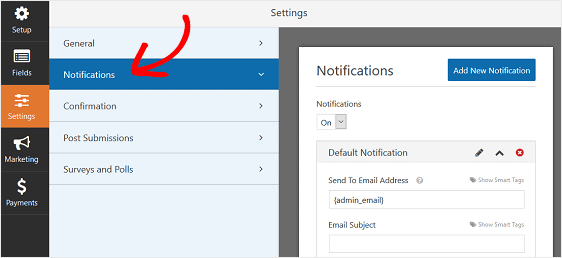
In this menu you can set up to be notified when someone donated, or choose not to be, you can also send an e-mail to the donator.
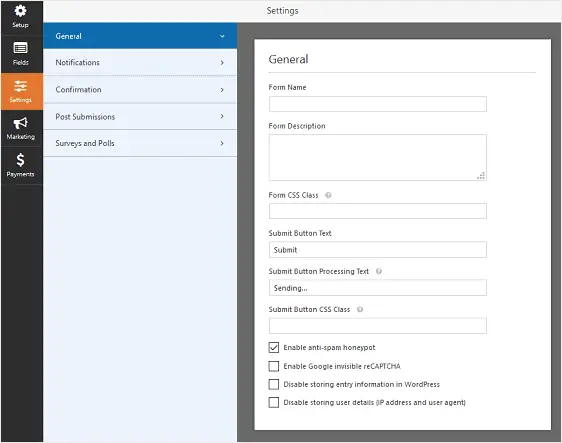
Obviously WPForms allows you to customize, with your brand, the header of the form.
The donation form contains also general settings that can be changed as you like:
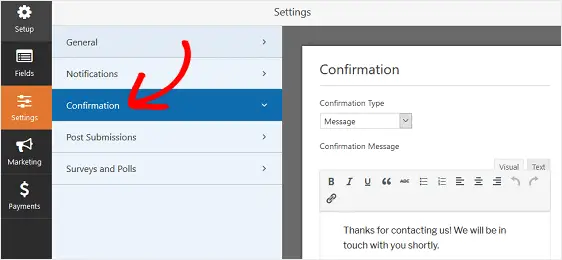
Once you have completed editing the general settings, you can also change and set up the form’s confirmation. Once one made a donation, you can choose what message is going to be displayed.
WPForms has three confirmation types to choose from:
- Message. A default confirmation message in WPForms.
- Show Page. This confirmation type will take site visitors to a specific web page on your site, thanking them for their donation.
- Go to URL (Redirect). This option is used when you want to send site visitors to a different website.
To start, click on the Confirmation tab in the Form Editor under Settings.
Next, select the type of confirmation type you’d like to create. For this example, we’ll select Message.
Last but not least, in order to accept donations, you’ll need to configure your payment settings.
WPForms integrates with PayPal, Authorize.Net, and Stripe for accepting payments.
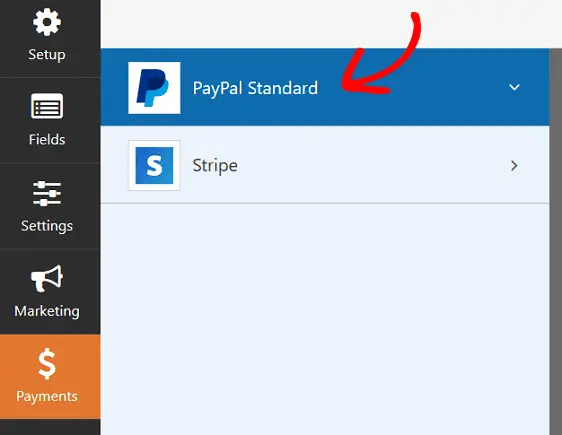
Now that you have installed WPForms, you can activate the various add-on as per your plan. To activate the PayPal add-on, you have to go to your WordPress Dashboard, select WPForms, and click on Add-ons.
Once you’ve done that, click the Payments tab in the Form Editor. Here you can set up PayPal to process donations.
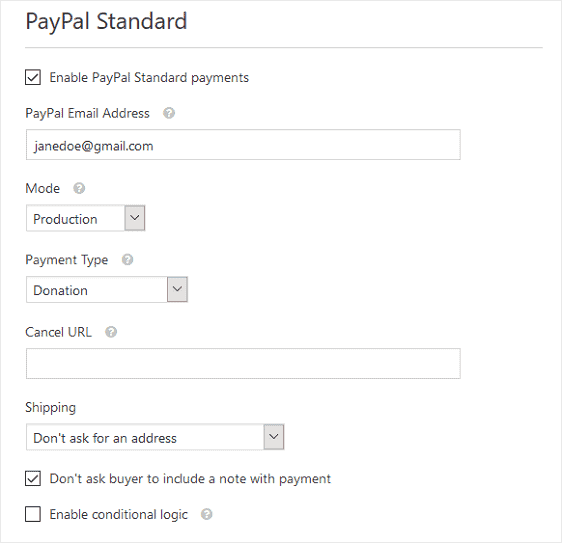
Here you’ll need to do the following:
- Click the checkbox enabling PayPal Standard payments on your donation form
- Enter the email address associated with your PayPal account
- Choose the Production mode
- Send site visitors to a specific URL if they don’t complete their PayPal donation
- Select your preferred shipping setting
- Decide whether to allow site visitors to include notes with payments
Once you have customized your form, you can now add this to your site.
WPForms allows you to add your forms to many locations on your website, including your blog posts, pages, and even sidebar widgets.
MORE ON DONATION FORMS
An excellent donation form allows you to collect donations on your website, it is customizable, it is mobile friendly ( adjusting if it is viewed on a mobile device), user-friendly, beautiful to look at, brand-able, it can track results, and you can use it across your posts and pages.
WPForms allows all those things to happen.
You may also read: